Safety Tips for DIY Painters: What You Should Never Overlook

Painting your home can be a rewarding DIY project, but it’s crucial to prioritize safety to prevent accidents and health issues. From preparing your workspace to handling paint products safely, there are several important safety tips that every DIY painter should follow.

Prepare Your Space

Before you dip your brush into the paint, ensure your workspace is properly prepared. Good ventilation is crucial, especially if you are using solvent-based paints. Open windows and use fans to circulate the air and disperse fumes. Remove any furniture or items that could obstruct your movement and cover anything that might get splashed with drop cloths.

Ensure the floor is slip-resistant by laying down anti-slip coverings, especially if working in a garage or basement with a smooth floor. This reduces the risk of falls, among the most common accidents during DIY projects.

Use the Right Equipment

Choosing the right tools helps achieve a better finish and ensures safety. Use a sturdy ladder or step stool when painting areas above your reach. Always follow the 4-to-1 rule for ladder safety: the base should be one foot away from the wall for every four feet of ladder height.

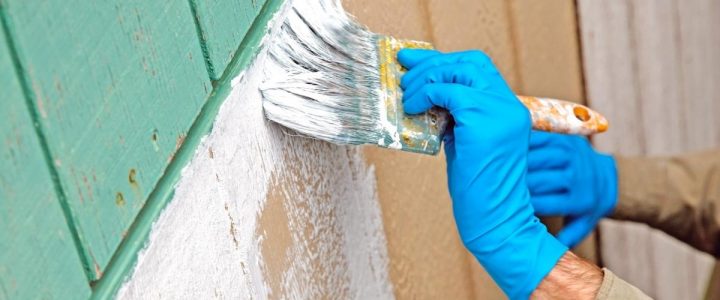
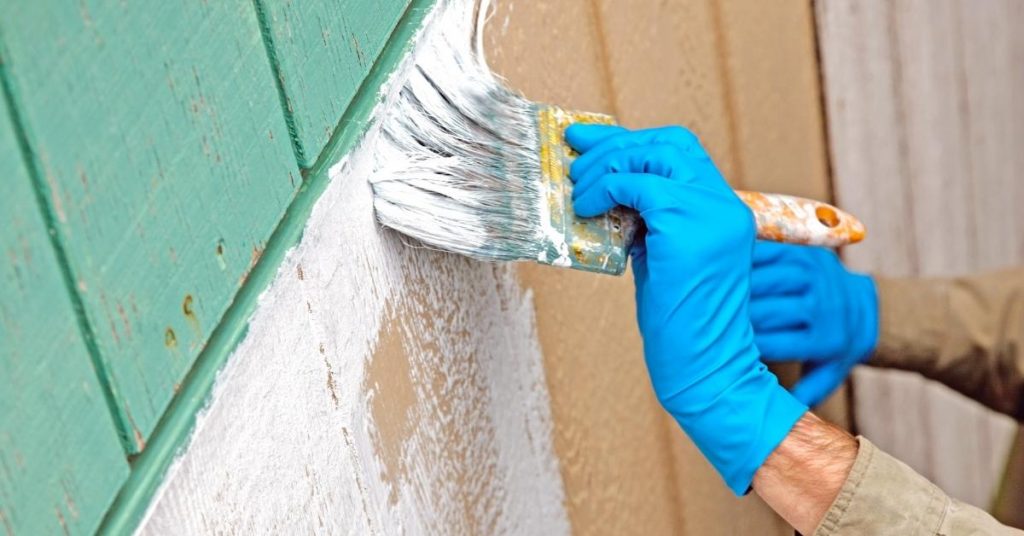
Wear appropriate clothing—long sleeves, pants, and closed-toe shoes—to protect your skin from irritant chemicals in paints. Safety goggles and disposable gloves protect your eyes and hands from splashes and direct contact with harmful substances.

Know Your Paint

Understanding the type of paint you’re using is vital. Water-based paints are generally less toxic and easier to clean up, but they may still contain harmful chemicals. Solvent-based paints, on the other hand, can release high levels of volatile organic compounds (VOCs), which can cause headaches, dizziness, and respiratory problems.

Always read the paint can’s label for specific safety instructions and information about the paint’s contents. If you’re using older paint, check if it contains lead, especially if your home was built before 1978. Lead-based paint requires special handling procedures to avoid serious health risks.

Handle Chemicals Safely

Many DIY painting projects involve more than just paint; primers, thinners, and cleaners are also commonly used. These substances can be hazardous, like paint, so handling them with care is essential. Never eat, drink, or smoke while handling paint products to prevent ingestion of chemicals.

Store paint and related products in a cool, dry place away from pets and children. Proper disposal is also crucial; check with your local waste management facility for guidelines on disposing of paint and chemicals.

Health First

Prolonged exposure to paint and its fumes can have long-term health effects. If you experience lightheadedness, difficulty breathing, or other symptoms while painting, stop immediately and get fresh air. If symptoms persist, seek medical attention.

For those with pre-existing conditions like asthma or allergies, consult a doctor before starting a painting project. Sometimes, it’s safer to hire professionals, especially for large projects or those involving high-risk areas like ceilings or exteriors.

Bottom Line

By taking the necessary precautions and using the right tools, DIY painting can be both safe and satisfying. Remember, safety should never be an afterthought in your DIY projects. Whether you’re a novice or an experienced painter, adhering to these safety tips will help ensure a successful, accident-free painting experience.

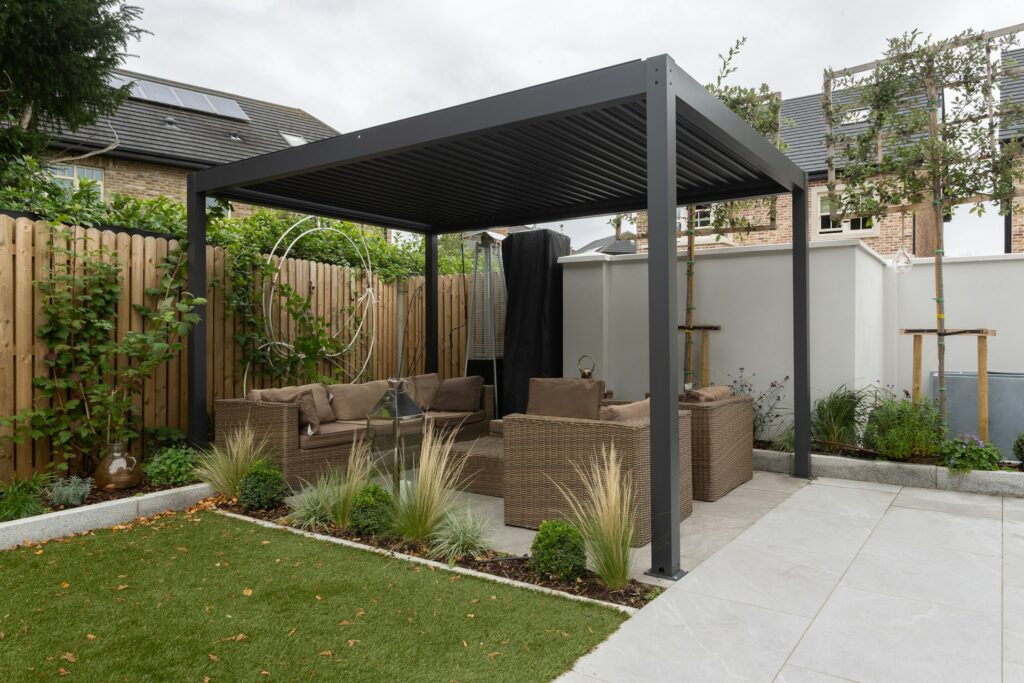
Motorized Pergola Maintenance: Essential Tips and Tricks

Motorized Pergola Maintenance: Essential Tips and Tricks

Motorized pergolas are a fantastic addition to any outdoor space, offering shade, style, and convenience at the touch of a button. However, like any outdoor structure, they require regular maintenance to ensure longevity and optimal performance. Whether you own a motorized pergola in Nashville, TN, or elsewhere, these tips and tricks will help you keep it in top condition.

Regular Cleaning

Regular cleaning is crucial for maintaining the appearance and functionality of your motorized pergola. Dirt, dust, and debris can accumulate on the slats and motor mechanism, potentially causing damage over time. Use a soft brush or cloth and mild detergent to clean your pergola. Avoid using abrasive materials or harsh chemicals, as they can damage the finish. For those in humid climates like Nashville, more frequent cleaning may be necessary to prevent mold and mildew buildup.

Inspect and Lubricate Moving Parts

The motorized components of your pergola need regular inspection and lubrication to operate smoothly. Check the motor, gears, and tracks for any signs of wear or damage. Apply a silicone-based lubricant to the moving parts every few months to ensure they move effortlessly. This simple step can prevent costly repairs and extend the lifespan of your motorized pergola in Nashville, TN,.

Check Electrical Connections

Since motorized pergolas rely on electrical components, ensuring all connections are secure and free from damage is vital. Periodically check the wiring for any signs of fraying or wear. If you notice any issues, it’s best to contact a professional electrician to address them. Proper electrical maintenance will ensure your motorized pergola in Nashville, TN, operates safely and efficiently.

Schedule Professional Maintenance

While regular DIY maintenance is essential, scheduling professional maintenance at least once a year can be incredibly beneficial. Professionals can perform a more thorough inspection and service, ensuring all components are in excellent working order. This is especially important for a motorized pergola in Nashville, TN, where varying weather conditions can cause unique wear and tear.

Clean and Care for the Canopy

If your motorized pergola in Nashville, TN includes a canopy, cleaning and caring for it regularly is crucial. Remove any dirt, leaves, or debris that might accumulate. Depending on the material, you might need to wash the canopy with a mild soap solution and rinse it thoroughly. Allow it to dry completely before retracting to prevent mold and mildew.

Winterizing Your Pergola

As winter approaches, take steps to winterize your motorized pergola. Clean and inspect all components, lubricate moving parts, and retract the pergola to protect it from snow and ice damage. Cover the pergola with a weatherproof cover to provide an extra protection against the elements.

Transform Your Outdoor Space with Louvered Pergolas by Anchor

Experience the ultimate in outdoor living with Louvered Pergolas by Anchor. Their motorized pergolas in Nashville are designed to provide both style and functionality, allowing you to enjoy your outdoor space year-round. Whether it’s rain or shine, Louvered Pergolas by Anchor offers a customizable solution to suit your needs. Contact them today to enhance your outdoor experience!

Louvered Pergolas by Anchor

Nashville, Tennessee, USA

Phone Number: +16292090794

https://anchorinc.com/premium-pergolas-for-homes-and-businesses-in-nashville-tn

5 Essential Factors to Assess Before Professional Blinds Installation in Northport, NY

window blinds
window blinds

Whether you’re sprucing up a residential or commercial property, selecting the right blinds can significantly impact your rooms’ overall ambiance and functionality. Here are five crucial factors to consider before installing professional blinds in Northport, NY, ensuring your project meets all your needs and preferences.

1. Understanding the Local Climate and Light Exposure

The climate in Northport, NY, plays a pivotal role in selecting the appropriate blinds. Considering the humid conditions and varying light exposures throughout the year, choosing materials and designs that withstand these elements is crucial. Whether protecting your interiors from UV rays or optimizing energy efficiency during different seasons, understanding local climate conditions is a critical step in the blinds installation process in Northport, NY.

2. Aesthetic Compatibility with Your Space

When considering blinds installation in Northport, NY, it’s essential to ensure that the style of the blinds complements your existing decor. There are many styles and materials, from classic Roman and Venetian blinds to contemporary roller shades. Selecting the right color, pattern, and material can enhance the visual appeal of your room, making your blinds functional and a significant part of your interior design.

3. Privacy and Light Control Needs

Balancing natural light and privacy is critical for blinds installation in Northport, NY. Different rooms in your home or business may require varying light control and privacy levels. For instance, blackout blinds might be ideal for bedrooms to ensure a restful environment. At the same time, light-filtering shades could be perfect for living areas, where you want to enjoy natural light without compromising privacy.

4. Operational Ease and Safety Features

The operational mechanism of your blinds is another important aspect to consider. With options ranging from manual to motorized and smart blinds, choosing the right one can significantly affect the convenience and safety of your space. Especially in homes with young children or pets, opting for cordless blinds or those with remote controls can enhance safety. Smart blinds, which can be integrated with home automation systems, are becoming increasingly popular in Northport, NY, offering both convenience and energy efficiency.

5. Professional Assessment and Customization Options

Professional blinds installation in Northport, NY, goes beyond mere installation. It involves a thorough assessment of your windows and a discussion of customization options. Professionals can provide tailored solutions that fit your needs, from custom sizes and shapes to unique material choices. They can also navigate local building codes and homeowners’ association regulations, ensuring your blinds installation is beautiful and compliant.

Discover Your Ideal Blinds in Northport, NY!

Transform your living or working space with the finest selection from Blinds Near Me By East End Blinds, located in the heart of Northport, NY. They offer diverse high-quality, stylish blinds tailored to meet individual preferences and needs. Whether customers are searching for energy-saving options, modern smart blind technologies, or designs that enhance the ambiance of their space, they provide it all. Call them now!

Blinds Near Me By East End Blinds

814836 Fort Salonga Rd #108, Northport, NY 11768, United States

Phone Number: +16317106431

https://eastendblinds.com/blinds-northport

The Importance of High-Quality Paint in Commercial Buildings

The Importance of High-Quality Paint in Commercial Buildings

Commercial buildings serve as more than just physical structures; they are reflections of a company’s identity, values, and professionalism. From office spaces to retail establishments, the appearance of these buildings plays a crucial role in shaping the perceptions of clients, customers, and employees alike. 

While factors such as architecture and interior design contribute to the overall aesthetic, the quality of paint used on the walls is often underestimated. 

Here’s why investing in premium paint products is a wise decision for property owners and managers:

Enhancing Aesthetics and Brand Image

The exterior and interior appearance of a commercial building significantly influences the perception of the business it houses. A well-maintained and aesthetically pleasing building communicates professionalism, attention to detail, and a commitment to quality—all of which are essential components of a strong brand image. High-quality paint can transform dull or outdated spaces into vibrant and inviting environments that leave a positive impression on visitors and passersby.

Ensuring Longevity and Durability

Commercial buildings are subject to high levels of foot traffic, frequent use of amenities, and exposure to various environmental factors. As such, the paint used on their walls must be able to withstand the rigors of daily wear and tear. High-quality paint formulations are engineered to provide superior durability, resistance to abrasion, and long-lasting color retention. These properties ensure that the paint maintains its appearance and integrity over time, reducing the need for frequent touch-ups or repainting. Investing in high-quality paint not only saves money in the long run but also minimizes disruptions to business operations by reducing maintenance requirements.

Improving Indoor Air Quality

Indoor air quality is a critical factor in creating a healthy and comfortable environment for building occupants. Low-quality paints often contain volatile organic compounds (VOCs) and other harmful chemicals that can off-gas into the air, contributing to indoor air pollution and potential health risks. In contrast, high-quality paints are formulated with low or zero VOCs, making them environmentally friendly and safe for use in occupied spaces. 

Facilitating Ease of Maintenance

Maintaining the appearance of a commercial building can be a time-consuming and costly endeavor, particularly if the paint used is prone to fading, chipping, or staining. High-quality paints offer superior adhesion, coverage, and washability, making them easier to clean and maintain. Additionally, high-quality paints are less prone to color fading or discoloration due to exposure to sunlight, ensuring that the building maintains its aesthetic appeal for years to come.

Final Thoughts

The importance of high-quality paint in commercial buildings cannot be overstated. From enhancing aesthetics and brand image to ensuring longevity and durability, premium paint products offer numerous benefits for property owners and managers. By investing in high-quality paints, commercial buildings can maintain their appearance, protect their assets, and create environments that promote occupant health and well-being. 

With these considerations in mind, property owners should prioritize the selection of premium paint products for their next painting project, ensuring a lasting and impactful result.

6 Creative DIY Projects with Rectangular Aluminum Tubing

6 Creative DIY Projects with Rectangular Aluminum Tubing

The materials you choose in DIY and home improvement can make all the difference. Among the many options for metal steel supply near me in Southington, CT, rectangular aluminum tubing stands out for its versatility, strength, and ease of use. Whether you’re a seasoned DIY enthusiast or a beginner looking to start your first project, incorporating this material can lead to stunning results. Below, we explore six top DIY project ideas that make the most of rectangular aluminum tubing, showing you the potential of metalwork in enhancing your living space.

1. Customized Shelving Units

One of the simplest yet most impactful ways to utilize rectangular aluminum tubing is by creating customized shelving units. Aluminum’s strength and lightweight nature make it ideal for supporting heavy loads and perfect for books, decorative items, or kitchen supplies. Design your shelving framework with aluminum tubing, adding wooden planks or glass for the shelves. This project adds a modern industrial touch to any room and offers a practical storage solution.

2. Elegant Frame for Mirrors or Artwork

Elevate the look of your mirrors or artwork with a custom frame made from this versatile metal steel supply near me in Southington, CT. By cutting the tubing to your desired dimensions and assembling a frame, you can add a sleek, modern border to your decorative pieces. This approach works exceptionally well in contemporary spaces, bringing an element of sophistication and highlighting your artistic taste.

3. Innovative Garden Structures

For those with a green thumb, rectangular aluminum tubing offers an exciting opportunity to create innovative garden structures. From sturdy trellises for climbing plants to lightweight frames for protective greenhouses, aluminum’s resistance to corrosion makes it an ideal choice for outdoor projects. Such structures enhance your garden’s functionality and contribute aesthetically, adding a modern architectural element to the natural landscape.

4. Durable Outdoor Furniture

Why settle for store-bought when you can build durable and stylish outdoor furniture using this quality metal steel supply near you in Southington, CT? Design everything from benches and tables to lounge chairs, tailored to fit your outdoor space perfectly. Aluminum’s durability ensures your furniture withstands the elements, providing a comfortable and chic setting for outdoor gatherings.

5. Unique Lighting Fixtures

Get creative with lighting by constructing unique fixtures out of rectangular aluminum tubing. Whether a floor lamp, a hanging pendant, or an artistic wall sconce, aluminum tubing can be bent and cut to create various shapes and designs. Pair your metalwork with different light sources for a bespoke lighting solution that’s sure to be a conversation starter.

6. Decorative Room Dividers

Create functional and decorative room dividers using rectangular aluminum tubing for a modern twist on space management. You can form intricate patterns or simple grids by welding or joining pieces together, filling them with glass, fabric, or wood panels. This project allows you to redefine your living spaces, providing privacy and style in equal measure.

Where to Find Your Metal Supplies

Finding a reliable metal steel supply near me in Southington, CT, is crucial to bringing these projects to life. Quality materials are the foundation of any successful DIY project, and rectangular aluminum tubing is no exception. For those looking for top-notch materials, Aluminum Metal Material Suppliers – Fast Metals is a trusted supplier that caters to all your metal needs. Whether you’re embarking on a small home project or a larger renovation, they provide a wide range of metal products to suit any requirement.

Aluminum Metal Material Suppliers – Fast Metals

45 Newell St, Southington, CT 06489, United States

Phone Number: +18609017867

https://fastmetals.com/aluminummetalsupplier-southingtonct

How to Pick the Perfect Color Scheme for an Open Floor Plan

How to Pick the Perfect Color Scheme for an Open Floor Plan

Designing an open floor plan can be both exciting and daunting. With a blank canvas that involves multiple spaces, selecting the right color scheme becomes pivotal in creating harmony and visual flow. From coordinating hues to considering lighting, here’s your comprehensive guide to picking the perfect color scheme for an open floor plan.

Understand Your Space

Before diving into color choices, take a step back and assess your open floor plan. Consider natural light, architectural features, and the overall ambiance you want to achieve. Understanding these elements will guide your color decisions and ensure a cohesive look throughout the space.

Establish a Unified Palette

Opt for a cohesive color palette that ties together different areas of your open floor plan. Choose a dominant color as the foundation, then select complementary shades for variation. Harmonizing the palette creates visual continuity and enhances the sense of openness in your living space.

Play with Contrast

Incorporate contrast strategically to add depth and visual interest to your open floor plan. Experiment with light and dark hues to highlight architectural details or delineate separate zones within the space. Thoughtful contrast can elevate your color scheme and create dynamic focal points throughout the room.

Consider Natural Light

Take advantage of natural light when selecting colors for your open floor plan. Light-filled spaces tend to amplify colors, so opt for softer tones to prevent overwhelming brightness. Conversely, if your space lacks natural light, consider incorporating warmer hues to add coziness and depth to the environment.

Test Samples in Different Lighting

Colors can appear differently under various lighting conditions, so testing samples in different parts of your open floor plan is essential. Experiment with paint swatches during different times of the day to observe how they interact with natural and artificial light. 

Balance Neutrals and Accents

Strike a balance between neutrals and accent colors to achieve a harmonious color scheme. Neutrals provide a versatile backdrop for your decor while accent hues infuse personality and vibrancy into the space. Aim for a mix of both to create visual balance and prevent your open floor plan from feeling too monotonous or overwhelming.

Incorporate Texture and Finish

Don’t overlook the importance of texture and finish in your color scheme. Experiment with different paint finishes, such as matte or satin, to add dimension and visual appeal to your walls. Additionally, consider incorporating textured elements like wood accents or metallic finishes to enhance the tactile experience of your open floor plan.

Seek Inspiration

Draw inspiration from various sources to fuel your creativity when choosing a color scheme. Browse interior design magazines, explore online platforms like Pinterest, or take cues from nature and artwork. Exposing yourself to different color combinations and aesthetics will give you insight into what resonates with your personal style and vision.

Create Your Perfect Palette!

Designing the perfect color scheme for an open floor plan requires careful consideration and creativity. By understanding your space, establishing a unified palette, and incorporating contrast and texture, you can craft a visually stunning environment that reflects your unique personality. Experiment, seek inspiration, and let your creativity flourish to elevate your floor plan’s color scheme!

Pro Tips for Painting Ceilings: Avoiding Drips and Achieving a Smooth Finish

Pro Tips for Painting Ceilings: Avoiding Drips and Achieving a Smooth Finish

Painting ceilings can be a daunting task, with the risk of drips and uneven finishes causing frustration for many DIY enthusiasts. However, armed with the right knowledge and techniques, you can transform your ceiling-painting experience from a potential disaster to a smooth, drip-free masterpiece. In this guide, we’ll explore pro tips to help you achieve professional-looking results while avoiding common pitfalls.

1. Preparation is Key

Before you even think about picking up a paintbrush, thorough preparation is crucial. Start by removing furniture or covering it with plastic sheets to protect it from splatters. Clean the ceiling surface thoroughly to remove any dust or grease that could affect paint adhesion. Fill any cracks or holes with spackle, and sand the surface for a smooth finish. A well-prepared surface ensures that your paint will adhere properly and the final result will be flawless.

2. Choose the Right Paint and Tools

Selecting the appropriate paint and tools is a pivotal step in achieving a smooth ceiling finish. Opt for a high-quality ceiling paint that is specifically formulated to resist drips and splatters. These paints are often thicker and less prone to dripping than standard wall paints. Invest in a quality synthetic paintbrush or a roller with an extension pole, which allows you to reach high areas without straining.

3. Use a Primer

Applying a primer before the actual paint not only enhances adhesion but also helps in achieving a uniform finish. A good primer seals the surface, preventing the paint from being absorbed unevenly. This step is especially crucial when dealing with ceilings that have stains or discoloration, as a primer can help block them and ensure the final coat of paint looks clean and vibrant.

4. Cutting In with Precision

Start by cutting in the edges of the ceiling using a high-quality angled brush. This step requires a steady hand and patience. By carefully cutting in, you create a clean edge where the ceiling meets the walls, reducing the risk of drips and ensuring a professional look. Take your time during this step, as precision here sets the tone for the rest of the painting process.

5. Work in Sections

To avoid drips and achieve an even finish, it’s wise to work in manageable sections. Divide the ceiling into smaller portions, and focus on one section at a time. This approach allows you to maintain control over the paint application and reduces the likelihood of drips occurring. Be mindful of your roller or brush technique, using long, smooth strokes to create a seamless finish.

6. Mind Your Lighting

Proper lighting is often overlooked but plays a crucial role in spotting imperfections and drips. Ensure that the room is well-lit from multiple angles, using natural light whenever possible. This will help you identify any uneven areas or drips and address them promptly, resulting in a smoother and more professional-looking ceiling.

7. Take Breaks and Be Patient

Painting a ceiling can be physically demanding and mentally exhausting. Take breaks when needed to maintain focus and precision. Rushing through the process increases the likelihood of mistakes and drips. Patience is key to achieving a flawless finish, so take your time and allow each coat to dry thoroughly before applying the next.

Conclusion

Mastering the art of painting ceilings requires a combination of proper preparation, the right tools, and strategic techniques. By following these pro tips, you can ensure a drip-free and smooth finish that will leave your ceilings looking professionally painted. Remember, patience and attention to detail are your allies in achieving stunning results that will elevate the overall aesthetic of your living space. Happy painting!

How Weather Conditions Impact Exterior House Painting

How Weather Conditions Impact Exterior House Painting

When embarking on an exterior house painting project, one critical aspect often overlooked is the influence of weather conditions. Understanding how temperature, humidity, wind, and rain can impact paint application and drying is crucial for achieving a lasting and aesthetically pleasing finish. It’s important to navigate through the complexities of weather-related challenges in house painting to ensure a successful and durable outcome.

How Temperature Affects Exterior Painting

Optimal temperature is a pivotal factor in exterior house painting. The ideal range typically falls between 50°F and 85°F. Painting in temperatures too far above or below this spectrum can lead to a host of problems. In extreme heat, paint may dry too quickly, leading to an uneven finish, while in colder conditions, it may not dry properly, resulting in cracking or peeling over time. It’s essential to check the paint manufacturer’s recommendations for temperature guidelines to ensure the best results.

Humidity’s Effect on Paint Application

Humidity plays a significant role in the house painting process. High humidity levels can prolong the drying time of paint, increasing the likelihood of drips and an uneven finish. Additionally, excess moisture in the air can prevent paint from adhering properly to surfaces. To mitigate these issues, it’s advisable to paint during the lower humidity periods of the day, typically in the late morning or early afternoon, and to closely monitor local weather forecasts.

Wind and Its Impact on Painting

While often overlooked, wind can be a formidable adversary during exterior house painting projects. Strong winds can cause debris and dust to stick to wet paint, ruining the smoothness of the finish. Furthermore, wind can accelerate the drying process in an uncontrolled manner, leading to potential cracking. To counteract these effects, it’s wise to set up windbreaks when possible and to choose days with milder wind conditions for painting.

Rain and Moisture Considerations

Rain and moisture are arguably the most detrimental elements to house painting. Painting during or shortly before rain can result in water spots and even wash away fresh paint. To avoid these pitfalls, it’s crucial to monitor weather predictions closely and plan painting sessions accordingly. A dry weather window of at least 24 to 48 hours is recommended before and after painting to allow for proper drying and curing.

Sunlight and UV Exposure

Direct sunlight can also impact the house painting process, particularly in terms of drying and long-term durability. UV rays can cause paint to fade and degrade over time. Painting in direct sunlight can lead to rapid drying, which might result in an uneven finish. It’s often best to paint exterior surfaces in the shade or during cooler parts of the day to avoid these issues.

Conclusion

Weather conditions play a pivotal role in the success of exterior house painting. By understanding and adapting to the challenges posed by temperature, humidity, wind, rain, and sunlight, homeowners can ensure a smooth and lasting paint job. Planning, patience, and a bit of flexibility in response to weather forecasts are key to achieving a professional-quality finish in any house painting endeavor.

Eco-Friendly Painting Tips: How to Go Green with Your Project

Eco-Friendly Painting Tips: How to Go Green with Your Project

Painting your home can be a transformative experience, but it’s essential to consider the environmental impact of your choices. By adopting eco-friendly painting practices, you can reduce your carbon footprint and create a healthier living environment. In this article, we’ll explore eco-friendly painting tips to help you go green with your next project.

Choose Low-VOC Paint

Volatile Organic Compounds (VOCs) are chemicals in many conventional paints that can release harmful fumes into the air, known as off-gassing. To minimize the impact on indoor air quality and the environment, opt for low-VOC or zero-VOC paints. These paints contain fewer harmful chemicals and are less likely to contribute to indoor air pollution.

Use Natural Paints

Consider natural paints from organic and non-toxic ingredients such as clay, milk, or plant-based pigments. These paints are biodegradable, have minimal environmental impact, and are safe for humans and pets.

Reuse and Recycle Paint

Before purchasing new paint, check for any leftover paint from previous projects that can be reused. If not, look for recycling programs that accept old paint cans and recycle them responsibly.

Buy Eco-Friendly Brushes and Rollers

Invest in high-quality, eco-friendly paintbrushes and rollers made from sustainable materials. These brushes are not only better for the environment but also provide better results and can be reused for multiple projects.

Opt for Sustainable Materials

Choose sustainable materials for your painting project. This includes selecting FSC-certified wood for trim and molding, as well as sustainable or reclaimed wood for any renovations. Sustainable materials reduce the environmental impact of your project.

Properly Dispose of Paint Waste

Dispose of paint waste responsibly by following local guidelines. Many areas have hazardous waste disposal facilities where you can drop off paint cans and other hazardous materials. Avoid pouring paint down drains or into the ground, as it can contaminate water sources.

Use Eco-Friendly Paint Strippers

If you need to remove old paint, choose eco-friendly paint strippers that are biodegradable and non-toxic. These products are safer for both the environment and your health.

Practice Water-Based Cleaning

When cleaning your brushes and rollers, opt for water-based cleaning solutions instead of harsh chemicals. This reduces the release of harmful chemicals into the environment.

Consider Eco-Friendly Painters

If you’re hiring professional painters, choose contractors who prioritize eco-friendly practices. Ask about their use of low-VOC paints, sustainable materials, and their disposal methods for paint waste.

Energy-Efficient Painting

Reduce energy consumption during your painting project by turning off lights and appliances when not in use. Additionally, use natural daylight whenever possible to minimize the need for artificial lighting.

Reuse Drop Cloths

Instead of using disposable plastic drop cloths, invest in reusable canvas or fabric drop cloths. These can be washed and used for multiple projects, reducing waste.

Eco-friendly painting is not only good for the environment but also for your health and the well-being of your family. By making conscious choices in your painting project, you can reduce your carbon footprint, improve indoor air quality, and contribute to a more sustainable future. So, next time you pick up a paintbrush, consider these eco-friendly tips to make a positive impact on your home and the planet.

What is the Impact of Paint Color on Home Resale Value?

What is the Impact of Paint Color on Home Resale Value?

The presentation of a home can make or break a sale. While many factors contribute to a home’s appeal, one often overlooked aspect is its paint color. As homeowners prepare to list their properties, understanding the profound impact of paint color on resale value becomes paramount. 

The Psychology of Color

Colors are more than just visual elements; they carry emotional weight and can significantly shape our perceptions. For instance, a blue room might evoke feelings of calm and serenity, while a red one could stimulate energy and passion. When painting a home, it’s essential to recognize these psychological effects. The right color can create an inviting atmosphere that resonates with potential buyers, making them more inclined to make an offer.

Current Popular Paint Colors and Their Impact on Resale Value

Neutral Colors

Neutral colors like beige, gray, and white have always been favorites among homeowners and real estate professionals alike. Their universal appeal lies in their ability to make spaces appear larger, brighter, and more versatile. Potential buyers can easily envision their furniture and décor in a neutral setting, making the home more sellable.

Bold Colors

While bold colors can infuse personality into a space, they come with their set of challenges. A vibrant turquoise or deep maroon might be a homeowner’s personal preference, but it could deter potential buyers who don’t share the same taste. However, when used strategically, such as an accent wall, bold colors can enhance a home’s appeal.

Cool vs. Warm Tones

Recent painting trends lean towards cool tones like blues and greens, which are perceived as modern and refreshing. In contrast, warm tones, although cozy, might seem outdated to some buyers. Homeowners should consider current trends but also recognize that tastes vary, and what’s trendy today might not be tomorrow.

Exterior Paint Colors and Curb Appeal

First impressions are lasting, and the exterior painting of a home is a buyer’s initial introduction. A well-chosen exterior color can significantly boost curb appeal, making the property stand out in a sea of listings. While neutral tones are a safe choice, some homeowners opt for bolder hues to give their property a unique identity. However, it’s crucial to consider the neighborhood’s color palette to ensure the home doesn’t stick out like a sore thumb.

Cost vs. Return on Investment (ROI) of Repainting

Investing in a fresh coat of paint can yield significant returns. On average, painting a home can cost anywhere from a few hundred to several thousand dollars, depending on the size and complexity. However, the potential ROI, in terms of increased resale value and quicker sales, often justifies the expense. Moreover, a recently painted home signals to buyers that the property has been well-maintained.

Conclusion

Painting is more than just a decorative endeavor; it’s a strategic move that can significantly impact a home’s resale value. By understanding the nuances of color psychology, historical trends, and current preferences, homeowners can make informed decisions that enhance their property’s appeal and market value.